Once you’ve created an online quiz, test or assessment it’s possible to assign a grade based on the participants’ score.
The score is based on the number of points earned for correct answers on a quiz. While a grade indicates the participant’s level of accomplishment, which you can express as a letter, number, text or a mix.
With FlexiQuiz, you can create custom grades that system automatically assigns to a participant. A grade can also be used to determine if the participant passes or fails the examination and any quiz redirects.
This guide shows you how to create and manage custom grades.
How to add grades to new or existing quizzes
- Create a quiz
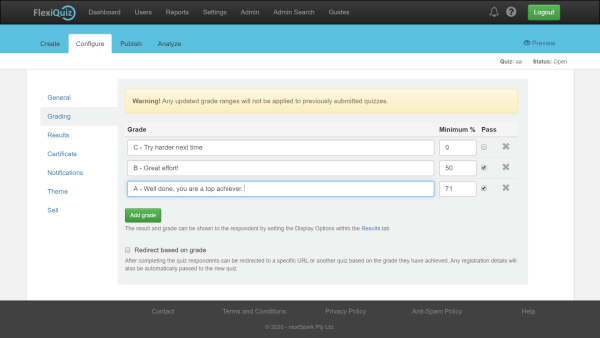
- Select the Configure tab
- Choose Grading from the left-hand menu
- Add your data to the relevant columns. These are the definitions for each column:
- Grade: The name of the grade that you would like to award the test-taker such as pass, exceptional or A++. You can include letters, numbers, or a short description. Top tip! The grade can be written in any language.
- Minimum %: This is the minimum percentage of points that the participant needs to earn to qualify for the grade.
- Pass: Check this box if the grade qualifies as a pass. A pass or fail can determine if the learner qualifies for a certificate, can re-take the test, and you can create custom messages based on a pass or fail.
- Redirect type: You can choose to redirect participants to another quiz or URL based on their grade
- Location: Select where your participants are directed to at the end of the quiz
- To add more grades to the examination, press Add grade.
This image shows an example of how the grading screen can be configured. In this example, to secure a B grade, the participant must earn 50% to 70% of the available points.
Your new grades are automatically saved and applied to any new responses submitted online.
Important! Your new grades will not apply to quiz responses that have already been submitted.
How to display grades on the results page
Once quiz takers have completed the test you can opt to display a results page that includes the participant’s grade. To show the grade on the results page, follow these simple steps:
- Create your quiz
- Configure the grades using the instructions shown above
- From the Configure screen select Results from the left-hand menu
- Tick the box Show results page
- Tick the box Grade

Quiz takers will now see the following results page at the end of the online test.

Paid plan members can also access the following advanced features:
- Change the ‘Grades’ heading displayed to quiz takers on the Results screen. You can update the word to better describe the meaning in almost any language.
- More the position of the grade shown to align on the left, center or right-hand side of the Results screen.
Relevant help guides:
How to create your first online test, quiz or exam
Setting redirects based on grades
How to allow retakes if students get a fail grade
How to share a certificate if students get a pass grade
Useful blogs: